18 December 2024

Roseville collection

I decided I wanted to do another in the Roseville vase/flowers series, but this time with a much smaller vase. So instead of using a 12x16-inch board, I went with a 12x12 cradle board. I knew I wanted to use my tiny Columbine vase in the blue-green shades, and to fill it with blue Plumbago from the bush in my front yard, but I wasn't sure what else I wanted to include.

Going with those themes, I thought about background and stenciling, went through my collection, and ended up painting the cradle board a warmish mushroom brown color as a ground (Raw Umber + White + Titan Green Pale). Then I stenciled flowers and leaves in tight patterns all over the face of the cradle board in shades of turquoise, light Ultramarine blue, Titan Buff, and Prussian blue. I gave that 10 minutes to dry, and then glazed over all of it with Titan Green Pale, a barely-there celery shade, to back off the strong colors of the stenciling and mute the mushroom background as well. This time I was going for more of an overall wallpaper effect.


Upon consideration, I decided I would also stencil the edges of the cradle board with the floral theme in the same colors, but would not glaze over them, allowing them to be a more distinctive iteration of the pattern as a sort of frame to the whole. That was a bit challenging—I had to hold the cradle board at an angle, while holding the stencil in place with the same hand and pouncing over the stencil with the other hand. I had one side that didn't turn out too successfully, so I figured I'd just put that one on the bottom! In the end I glazed the four sides as well, just to tone down and blend the colors together, although I left them a bit stronger than the treatment for the background itself, which I glazed over twice.

I'm afraid I have seen the best of the plumbago for the season, and there was very little left by the time I finally got around to cutting it (also, my pruning-mad gardener has been at work!), so I added in a few small white roses to fill out the bouquet. The columbine on the face of this vase is less yellow and more cream-white, so that seemed to work.

I always take a photo of the vase of flowers I'm planning to paint, because the flowers deteriorate daily once they are cut, even well supplied with water and in the cool temperature inside my house (no heater yet), so I need the static reference. I'm especially glad of that this time: When I got up the next morning after I cut the flowers and put them in the vase, the plumbago had already wilted and folded in on itself, so I was especially reliant on my photo to make the painting.

I suffered a fair amount of frustration getting ready to paint this: I first tried drawing with pencil, but it didn't show up over the busy background, so then I had the idea of doing a tracing using pan pastels. I printed the photo at the size I wanted to work, applied dark gray pan pastel to the back of it, and then taped it to the cradle board and penciled firmly over the picture outlines. But when I took the picture off, the tracing hardly showed at all! I wiped it clean and tried with a bright orange color, and that was even worse. White pan pastel didn't work either. I finally went back to the pencil, and made do, but this one was more reliant on eye-balling pretty much everything but the shape of the vase and a few flowers and leaves that managed to stand out against the background. It ultimately turned out okay, but I spent a lot more time than usual being fussy and adding more details as I went.

Ironically with these paintings, it always seems to be the surface (table top or whatever) and the shadow that are the most challenging parts of all, even though you would think you could just slap them down in 15 minutes or so. I painted and repainted this surface, going darker, then glazing lighter again, until I got it to a color and texture that read against the background without being too obtrusive; and then I redid the shadow about eight times, introducing more raw umber and prussian blue as I went and moderating it with a little of the Titan Green Pale.


This one is really about the textures, and I'm happy with the amount of show-through on the background and also with the more painterly, slightly less precise vase and flowers. The subtle colors worked just the way I wanted them to, and the cradle board, with the sides showing the pattern, will be beautiful when I hang it on a wall. I may have to keep this one for myself!

"Plumbago Columbine," stencil, pencil, and acrylics on wooden cradle board, 12x12 inches.


30 November 2024

She Can Fly!

One of my goals this coming year is to expand from simple shoulders-up portraits with an occasional hand in the picture to partial- or full-figure paintings. Of course, the plan included the idea that by now I would have cleared out my studio to make room for an easel on which I could paint much larger pieces, because doing full-figure means you either work smaller on the same size canvas, or keep working at the size you like, and expand to a bigger background. But...my studio is NOT cleared out, and I don't have room for my easel, so I decided I'd get a jump-start on the year by trying one at my typical size, which is 12x16 inches. And not to be timid about it, the reference I chose has not one but three people in it. They're children, but still...three! And they're not tiny children, they're probably 11 or 12 years old, so, yeah.

I found the photo online of a whole group of girls watching an older girl do something that was, to them, amazing, and someone caught them all with their mouths open and expressions of shock or surprise on their faces. The person doing the demonstration wasn't in the picture, so one could only speculate, but the girls are dressed like either dance pupils or gymnasts, and the photo was labeled "She Can Fly!" I cropped out all but three of the girls, picking the ones with different stances, heights, hairstyles, and body types to get as much variation as possible. (Here on the right is the rest of the photo that was cropped out.)

I chose to paint them as ballet students, so I tried to give the vague background the feel of a dance studio without getting too picky. I also gave them all the quintessential pale pink tights and black leotards worn by little ballet girls everywhere. This immediately became a challenge, because in the photo the girls are bare-legged, and some of their outfits are not one-piece black leotards but two-piece shorts-and-tank combos. Oh, and just to up the challenge, the reference photo was in black and white, so there was a lot to extrapolate.

I first made the mistake of painting their legs just as they appeared, but that made them look bare-legged, so I went back and glazed over all the shading with another couple of thin coats of Titan Mars Pale (sort of a skin-tone pink made by Golden) to get the legs to look like they were covered in fabric. The problem is, all the girls are also caucasian, so their actual skin tones would likewise be pinkish. I tried to give a bit of nuance, both by adding some Naples Yellow to the mix and by going strong with the shadows in Cobalt Violet and accentuating their reddened cheeks. I also decided to give a little variation to them by only painting one of the three as blonde (even though all three had light hair), making the middle one a "ginger" and the one on the right a brunette. I felt like since they were identically dressed and had extremely similar coloration, that was the only way to distinguish them.

Although I discovered with my last painting that I prefer working on thin birch board (with the bit of texture it provides) rather than on slick, ultra-smooth artist's panel, I might have done better to use the latter on this painting since the smaller you work, the harder it is to paint the details, and that bit of wood grain meant some imprecision. And since the reference photo was also quite blurry, getting things right became even more of a challenge—particularly those open mouths. It was hard to tell from the fuzzy photo whether there was actually tongue showing or not, and I repainted both the stretched lips and the interior of the mouths several times over on each of the girls.

My final challenges were environmental: The hydrolics in my desk chair are beginning to give up the ghost, and keep dropping to a level at which my knees are actively uncomfortable after just a short period of sitting; but I couldn't paint for long in one day anyway, because of the low winter light. I only have one working artificial light source in my studio at the moment (all the plugs are behind big furniture and thus hard to rearrange), and the afternoon light coming through the window has been significantly diminished both by the time change and by the season. Basically, I only have good light from about 1:00 to about 3:30, and that's if it's sunny outside rather than overcast. So this painting has taken me an inordinate amount of time to finish, because every time I'd get going, the light would go away.

Basically, rather than call this "She Can Fly," I should have titled it "Exercise in Frustration." But I'll stick with the more positive message.


Pencil, gesso, and acrylics on thin birch board, 12x16 inches.

17 November 2024

Pucker up

Laurie's final painting
That featured puckered-up mouth is just about the only thing my new painting turned out to have in common with the week-before-last LFI 24 lesson #45 with Laurie Johnson Lepkowska. I wanted to find my own reference photo, because I don't enjoy doing the exact same image as everyone else, so I did a search for girls and women with puckered lips and found this beauty below in a red beret with matching red lips.

I say it has little in common with Laurie's painting because she works in an incredibly organic way, drawing her person loosely with paint and a thin-tipped brush, then roughing in the features with broad brushstrokes and coming back after with just enough detail to capture the likeness. My process is much more painstaking and therefore less painterly and more blendy. I do aspire to what she does, but I'm too nervous or uncertain to go for it, most of the time. I may try this lesson again with yet another model, because I really liked her result and enjoyed how she went about the process. I also want to try out the simple Zorn palette she uses, instead of being so precious about my colors.

This was a challenge on several levels, the first one being the panel itself. I have become used to working on thin birch board, which has a certain roughness and texture to it. I was eager to try out a smoother surface to see if I would get better detail, but instead became somewhat frustrated at the outset while trying to get an even background—the brushstrokes tend to show much more on this slick surface, and coverage is more difficult. I decided to combat that by putting lighter streaks over the top of the flat background color. I liked it before I painted the portrait on it, but ultimately decided (with advice from Phoebe) that it was too busy, so I got rid of the streaks and went with a solid.

That pursed mouth has to include all the little wrinkles and indents made by cheek muscles to achieve that position without looking like a cinched-up purse, so there was that. And the scarf, which was similar (though not identical) to the reference photo, was also a lot of work. I didn't have a tiny enough brush to achieve the smallest dot pattern and ended up doing those areas with a white Signo gel pen, and I'm hoping that when I go to varnish, it doesn't all disappear! Likewise, the angles of fabric, stitching, and shadows on the criss-cross shirt were fiddly in all black. Finally, her hair, while being legitimately a mix of all those colors, came out kinda piebald instead of blending together like real hair. But I am happy with the portrait overall, and especially like the eyes.


"French Kiss"—pencil, acrylic, and gel pen on 12x16 artist's panel.

06 November 2024

Before the Deluge

Today, I kept thinking of that song by Jackson Browne to which I used to sing along in my naive youth. I called this post by that name because yesterday, before the deluge, before the disaster, the crash, the collapse of hope, I was still enjoying painting this still life of flowers in a vase from my Roseville collection.

The Roseville pattern here is "Columbine," which came in earth-tones like this one and also in blue-greens (I have a smaller vase with that color combo). The roses and asters and stalks of lavender are from what's left of my garden.

I would just like to say that roses are perhaps the hardest flowers to paint, with the possible exception of peonies, and although you wouldn't know it to look at them, I slaved over these for quite a long time! Asters are so much simpler, as is lavender.

I struggled with whether or not to add a "base" (a table-top, a longer shadow) under/behind the vase, but I really liked how the stencils were showing through the glaze of paint, so I made a smaller shadow than would probably be cast, but at least it "grounds" the vase.

"Columbine and Asters"—stencils, pencil, and acrylics on thin birch board, 12x16 inches.

Some of them were dreamers
And some of them were fools
Who were making plans and thinking of the future
With the energy of the innocent
They were gathering the tools
They would need to make their journey back to nature
While the sand slipped through the opening
And their hands reached for the gold ring
With their hearts they turned to each other's hearts for refuge
In the troubled years that came before the deluge.


03 November 2024

Revenge Art

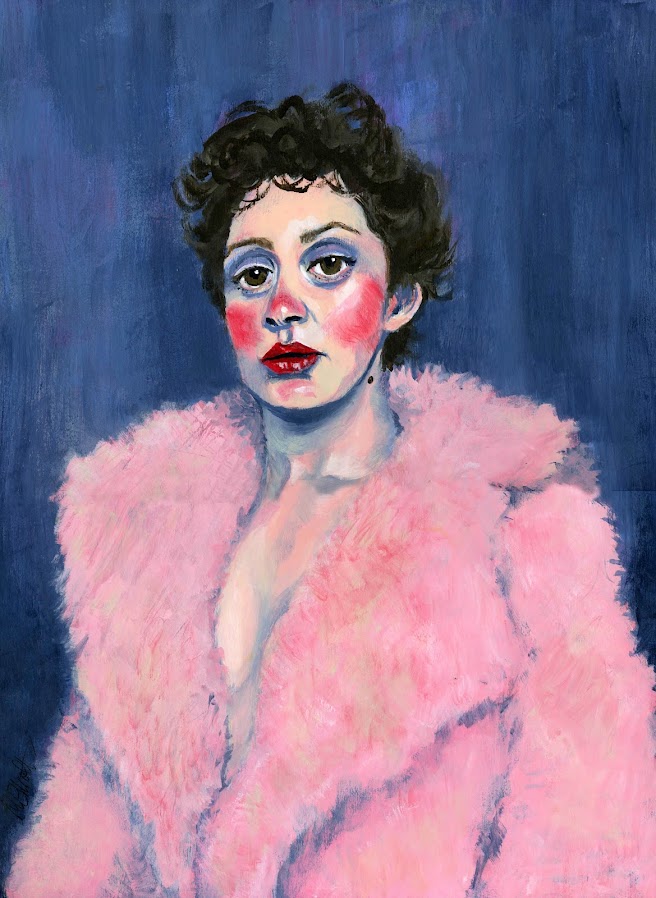
Today, as part of a "Let's Face It 2025" prequel, there was a fun lesson with Deanna Strachan-Wilson, collaging a Dia de los Muertos character. We prepped a black ground on a toned tan background, and then we were supposed to find an old painting we could cut up and use as the basis for our character. I pulled out my big stack of portrait faces and found one that was perfect for this exercise. It was painted in bright-colored inks in Deb Weiers-style, so it was a good base image, but there was another reason...

This woman is a writer and internet personality whose portrait I painted before I ever met her, simply because I found her face both beautiful and intriguing. Then, by a quirk of fate, I invited her to speak at a class I was teaching, and she misrepresented herself, lied by omission, maligned me, and continued to make rude and denigrating remarks afterwards on Twitter that riled up my class about something that wasn't true, garnering me the first bad evaluation I had ever had in my teaching career. So today, I was happy to give her black-ringed eyes, chalk white cheeks, and skull teeth. She doesn't really deserve the crown of flowers, but that's part of the costume, so I grudgingly glued them on.

I'm going to call this exercise a symbolic burying of my ire and my bad experience once and for all.


"La Cabrona," pen, watercolor, gesso, acrylic, collage papers, on tan cardboard, 9x12 inches.


12 October 2024

A new still life

In addition to my collection of 20th Century American pottery, I also have accumulated many wall pockets over the years. A wall pocket is a vase that is flat on one side, with a hole pierced in it somewhere at the top for hanging, and you mount it on the wall and put flowers in it (if it's still waterproof—I have a couple that aren't, and dribble water down the wall if you try to use them!). My mom found some in antique stores and got me started looking for them, and then my collection far outpaced hers; when she died, I added most of hers to mine, with the result that I have about about 21 currently hanging on various walls of my house and another 35-40 in a cabinet, waiting to be hung up or swapped out. Some are Roseville or McCoy or Weller, but many of them are of Japanese origin from the 1950s-70s and are shiny ceramic in bright colors.

One of my favorites of these is a red poppy, featuring a large flower, a bud, and some stems and leaves in a stylized design. I have it hanging thematically on one small strip of living room wall next to a botanical print of poppies in a cheap IKEA frame. I love the wall pocket, but am bored with the botanical print after all these years, so I decided to make a poppy painting of my own to hang up next to it. (Or I may have to hang the pocket above the painting, because the painting is wider than the botanical print.)

I decided to use another of my Roseville vases to hold the poppies. Since it's not poppy season right now, I found a photo of some poppies in a plain glass vase, and "put them" in my Roseville one instead. This pattern is called "Bushberry," and I like it a lot, for its colors, its shape, and its whimsical adornments and "elbow" handles. Floral paintings are really supposed to be all about the flowers, but the vase fights for all the attention in this one.

I made a substrate as I have done for the past two florals by painting a board in a couple of complementary colors, stenciling it in some of the colors I intended to use in the painting, and then glazing over the stencils to drop them back so they're barely there but still give texture. In this painting I also made a more defined surface on which to "sit" the vase, although I left it vague enough that it could be wood or maybe just a painted surface.

I struggled with the background a lot this time, and went over it again and again, trying different things. I ultimately ended up liking the way the yellows go from dark gold to light yellow gold to a haze or glow before transitioning into the blue at the top. Since the poppies would be red, I decided to go with a primary color theme of red-yellow-blue, varying it a bit for the vase and adding green there and for the flower stems.

This was one of those that started out frustrating, turned ugly, and took three days of painting and re-painting all the elements to get it to a point where it suddenly gelled. I think I like it; we'll see if that lasts or if I decide to go back in!


"BushPoppies"—gesso, acrylic, stencils, pencil, matte medium, on thin birch board, 12x16 inches.

08 October 2024

Goofing off

I started a new still life yesterday, but I'm so unhappy with almost every aspect of it that I didn't want to work on it today! So instead I'm responding to a total stranger's request.

I miss getting snail mail. I'm old enough that that used to be the only way we got birthday greetings, and I always had a whole shelf of birthday cards every October 4th, but these days the cards are few and far between; people post a greeting (some basic, some more festive) on Facebook and that's an end to it. So when I saw this request on Instagram (@colesjuliana1),
I decided to do it.

An artist who herself paints all things "pirate" as a recurring theme in her mixed-media work is turning 61 on October 17th, and said that all she wanted for her birthday was 61 pirate postcards, but she wasn't sure she had that many friends to fulfill her wish. I immediately related, so today I made a birthday greeting for Julianna Coles for her 61st birthday. Happy Birthday, Matey!

(I also happen to know three other people whose birthday is on October 17th, so maybe I'll get more ambitious and make postcards for them as well, now that I've made the one...)


"HB Matey"—pencil, watercolor, Uniball pen, gold Signo, computr printout,
on 140-lb. Fabriano watercolor paper, 5x7 inches (for mailing purposes).